OCaml Testing and CI
January 17, 2020
5 min read
Last updated: April 03, 2020

Whilst OCaml’s amazing type system might prevent a lot of common programmer errors, it certainly doesn’t mean you should not test your code! In this post, we’ll cover 3 different testing libraries - Alcotest, QCheck and PPX Expect, each with different styles of testing: unit tests, property-based tests and expect-tests respectively.
We then look at how you’d integrate them and compute test coverage in a CI workflow.
JUST GIVE ME THE CODE!
The template repo contains the examples mentioned in the blog post. Fork it to get up and running with Dune!
Alcotest
Alcotest is a lightweight OCaml unit testing framework. To install it, run opam install alcotest.
To understand Alcotest, we’re going to work bottom-up through the testing library.
Testable
First, let’s talk about how Alcotest compares your expected value with the actual value.
To compare two values of a given type 'a, we need to construct a new type 'a testable. We need two functions - a function to check equality of two values of type 'a, and a pprint function for 'a (used by Alcotest in the error message when your test fails - “Expected foo but got bar”).
Let’s create a simple type to demonstrate this:
type foo = Foo of string | Bar of int(* pprint_foo : Format.formatter -> foo -> unit *)let pprint_foo ppf = function| Foo str -> Fmt.pf ppf "Foo: %s" str| Bar i -> Fmt.pf ppf "Bar: %d" ilet foo_eq a b = (a=b)(* Pass these two functions in to get a value of type foo testable *)let foo_testable = Alcotestable pprint_foo foo_eq
Test Cases
Now that we have got a type that Alcotest can use to check equality, let’s construct a function that tests another function using Alcotest.check:
(* function to test *)let gen_foo () = Foo "Hello World"(* Alcotest test functions are of type unit -> unit *)let test_gen_foo () =Alcotest.(check foo_testable) "same foo" (Foo "Hello World")(gen_foo())
Running through this, the first argument to check is a value of the testable type. For the OCaml built-in types, Alcotest already has a testable type of the same name e.g. you’d write Alcotest.(check int).
The second argument is a string describing what we are asserting.
The third argument is the expected value (of type foo) and the final argument is the actual value when executing the function.
Great, so now we have a function that tests another function, let’s construct the Alcotest test case.
An Alcotest test case is of the form:
Alcotest.test_case "Test case name" `Quick test_something
The `Quick refers to the speed level of the test case: `Quick tests are run all the time, whereas `Slow tests can be optionally disabled (e.g. stress tests that you only run on major releases).
Running test suites
We’ve discussed how to create individual test cases, so let’s tie this together by running a test suite.
An Alcotest
Alcotest groups test cases together to form a test, and then groups these tests to form a test suite.
This looks something like this:
let () = Alcotest.run "Example test suite name"[("Name of test", [ list of test cases ]);("Name of another test", [ another list of test cases ])]
A concrete example (this is in the template repo):
let () =Alcotest.run "Example Alcotest suite"[( "Greetings",[Alcotest.test_case "Greeting teacher" `Quicktest_greeting_teacher;Alcotest.test_case "Greeting director" `Quicktest_greeting_director;] );( "Check Equality",[ Alcotest.test_case "Same teacher" `Quicktest_teachers_are_equal ] );]
produces the following output when run:
QCheck
So with Alcotest, we’ve shown how to write unit tests for particular test inputs. But what if we want to show an invariant of the function holds for all inputs? E.g. test that the function let id x = x is returns its input for all inputs.
This is known as a property-based test, and is where the testing library QCheck comes in. Rather than testing on a particular input, you get QCheck to generate random input values of that type and check the invariant holds true for all those inputs.
To install QCheck, run opam install qcheck.
Here’s how we’d test our identity function example in QCheck:
let test_identity_function =QCheck.Test.make ~count:1000 ~name:"test identity"QCheck.(int)(fun i -> (id i) = i)
Let’s run through the arguments:
First the named arguments: ~count is the number of random values we want to test on, and name is the name of the test case.
The next argument we pass is the generator of random values 'a - this has type 'a arbitrary. Here, we’re generating values of type int, and just like Alcotest, since int is a built-in OCaml type, there’s a provided generator: (QCheck.(int)) (it has type int arbitrary).
This excellent blog post by the creator of the library explains how you define your own 'a arbitrary type for your custom types 'a. The README of the library also provides more up-to-date examples.
Finally we provide a function that takes a randomly generated value a and returns whether or not the property holds (i.e its type signature is 'a -> bool). Here, we’re generating int inputs, so the function is of type int -> bool and checks whether the return value of id i is the int i itself.
QCheck integrates with other testing libraries really nicely. For Alcotest, run opam install qcheck-alcotest. Then we can convert a QCheck test case to an Alcotest test case using the QCheck_alcotest.to_alcotest function.
let alcotest_test_case = QCheck_alcotest.to_alcotest qcheck_test_case
PPX Expect
PPX Expect-Test is a testing library provided by Jane Street that takes a different approach to testing. We can install it by running opam install ppx_jane.
Traditional unit tests follow the format:
- Arrange (set up the inputs)
- Act (do the thing being tested)
- Assert (compare the result with a value)
Especially for custom types, there can be a lot of programmer overhead involved in the set-up and comparison steps.
Expect-tests provide an alternative: insert print statements in your code, and compare against the expected printed output.
Expect-Tests capture what we as programmers do when debugging - print statements - and use it as a regression test.
Check out this post on the Jane Street blog explaining expect-tests.
In terms of test code, it’s really quite brief:
let gen_hello_world () =let output_str = "Hello World" inprint_string output_str; (* insert print statement *)output_str(* Test in same file as source code *)let%expect_test "Test name" =(* run src code - here I'm ignoring the output *)ignore (gen_hello_world ());[%expect {|Hello World|}]
To run the test, since Jane Street (who open-sourced this library) run these tests inline with the source code, we need to add the (inline_tests) stanza to our dune file. We also need to preprocess the let%expect_test ppx extension with ppx jane.
So your dune file will look like:
(library(name test_parsing)(inline_tests)(preprocess(pps ppx_jane)))
Note a workaround if you, like myself, are not a fan of inline tests is to create a tests library that has the source code library as a dependency. The template repo has both styles of expect tests, so take your pick!
Autogenerated Test Output!
Oh, and if you were wondering how you’d generate the tests’ expected print outputs, this is done for you! The library generates .ml.corrected files in the _build/ directory when you run the test. Running dune promote after the test updates the source file with the corrected output.
Or in one simple command - dune runtest --auto-promote!
Test Coverage
Test coverage is a great metric to incorporate into your project, as whilst 100% test coverage != bug-free code, increasing test coverage can help you cover edge cases.
For test coverage, we’ll use the Bisect PPX library.
We then add bisect_ppx to our source code’s dune files, by adding bisect-ppx --conditional to the preprocess stanza.
We have the --conditional flag because we only want to annotate coverage information when we generate a test coverage report, not for the software that gets released.
For example, if we want to calculate test coverage for the modules in library Foo, the dune file would look like:
(library(name foo)(preprocess (pps bisect_ppx --conditional))
To generate the coverage report:
We first run
BISECT_ENABLE=yes dune build(set the conditional flag true when building).We then run our tests on the source code (using
dune runtestor whichever other test script you have).Finally, we generate our report, using
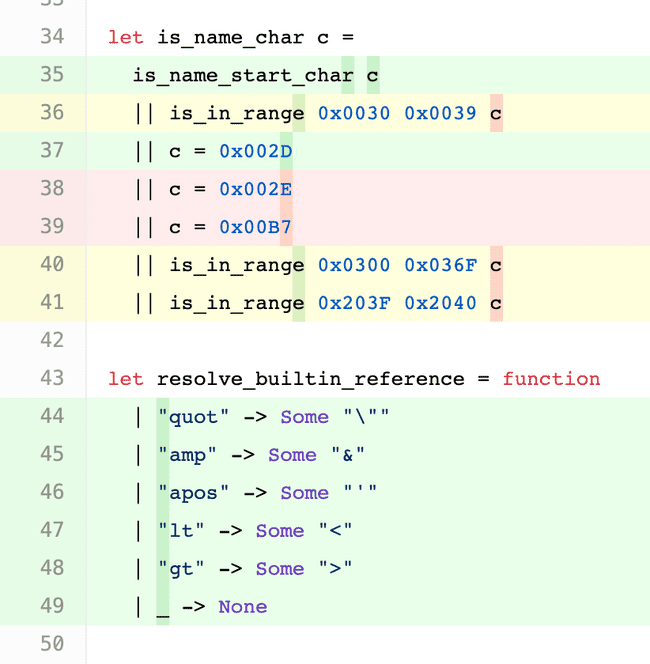
bisect-ppx-report summaryfor a textual summary, orbisect-ppx-report htmlto generate the html files in the_coverage/folder of your project.

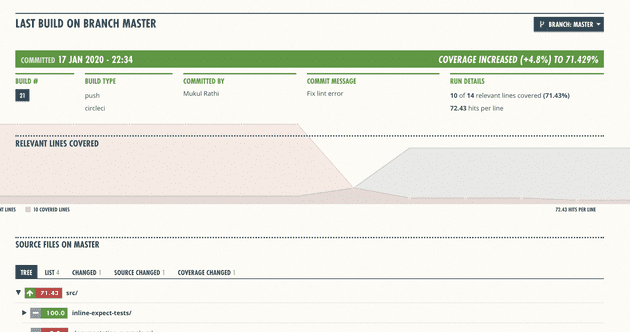
Finally, moving onto the topic of CI, we can use Coveralls.io to display the test coverage for each commit to the repo - in the CI we’d run bisect-ppx-report send-to Coveralls.
Continuous Integration
For continuous integration, this CI skeleton scripts repo contains set-up for Travis CI. However, in practice I found Circle CI is much faster, so I would recommend you use it instead.
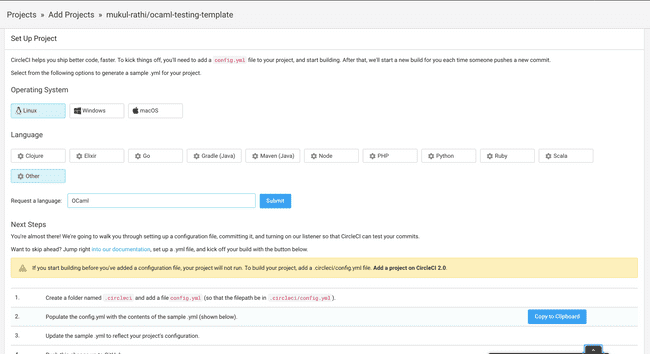
To set up Circle CI, we head to Circle CI and authenticate with GitHub. You’ll be greeted with a screen similar to this:

So instead, we’ll use a Docker setup, using a base OCaml debian image. We use CircleCI’s cache to cache the opam dependencies for our project, using the opam file’s checksum to determine when to flush the cache and do a fresh install. In the CI, we run the tests, and calculate and send the test coverage report to Coveralls.
This looks something like this:
version: 2jobs:test:docker:- image: ocaml/opam2:debian-10-ocaml-4.08environment:- TERM: dumbsteps:- checkout- restore_cache:key: cache-{{ checksum "hello_world.opam" }}- run:name: "Install deps"command: sudo apt-get install -y m4 && opam install --yes . --deps-only- save_cache:key: cache-{{ checksum "hello_world.opam" }}paths:- ~/.opam- run:name: "Set up source code for test coverage"command: opam exec -- BISECT_ENABLE=yes dune build- run:name: "Run tests"command: opam exec -- dune runtest- run:name: "Send Coveralls.io coverage report"command: opam exec -- bisect-ppx-report send-to Coverallsworkflows:version: 2build:jobs:- "test"
I’m using opam exec -- here so the CI can find dune - if you know of an alternative fix, please let me know!
Full details of the CircleCI config file are in the template repo. To send to Coveralls.io, you’ll need to add the environment variable $COVERALLS_REPO_TOKEN to your CircleCI project, the value of which you can get from the Coveralls website.
Wrap Up
The template repo contains code examples for the testing libraries mentioned, so I’d recommend you just fork it to get up and running!
The template repo also lints the code and autogenerates HTML documentation (discussed in the previous post on Dune) and deploys it to GitHub Pages. More detail about this in the README.
Feel free to tweet at me if you have any questions about this blog post. Till next time!
